Users: Edit Viewing Access Level/ja: Difference between revisions
From Joomla! Documentation
Created page with "ヘルプ5.x:ユーザー: 表示アクセス レベルの編集" |
Created page with "==説明== アクセス レベルは、どのユーザーがサイト上のどのオブジェクトを表示できるかを制御します。オブジェクトには、メニ..." |
||
| Line 1: | Line 1: | ||
<noinclude><languages /></noinclude> | <noinclude><languages /></noinclude> | ||
==説明== | |||
アクセス レベルは、どのユーザーがサイト上のどのオブジェクトを表示できるかを制御します。オブジェクトには、メニュー項目、モジュール、カテゴリー、コンポーネント項目 (記事、連絡先など) が含まれます。サイト内の各オブジェクトには、1 つのアクセス レベルが割り当てられます。ユーザー グループも各アクセス レベルに割り当てられます。 | |||
ユーザーがグループのメンバーであり、そのグループがアクセス レベルの権限を持っている場合、そのユーザーはそのアクセス レベルに割り当てられているすべてのオブジェクトを表示できます。ユーザー グループは親子階層に配置できることを理解することが重要です。その場合、子グループは親グループがアクセスできるすべてのアクセス レベルにアクセスできます。したがって、親グループがすでにアクセスできるレベルに子グループ アクセスを割り当てる必要はありません。 | |||
<div lang="en" dir="ltr" class="mw-content-ltr"> | <div lang="en" dir="ltr" class="mw-content-ltr"> | ||
Revision as of 23:47, 29 June 2024
説明
アクセス レベルは、どのユーザーがサイト上のどのオブジェクトを表示できるかを制御します。オブジェクトには、メニュー項目、モジュール、カテゴリー、コンポーネント項目 (記事、連絡先など) が含まれます。サイト内の各オブジェクトには、1 つのアクセス レベルが割り当てられます。ユーザー グループも各アクセス レベルに割り当てられます。
ユーザーがグループのメンバーであり、そのグループがアクセス レベルの権限を持っている場合、そのユーザーはそのアクセス レベルに割り当てられているすべてのオブジェクトを表示できます。ユーザー グループは親子階層に配置できることを理解することが重要です。その場合、子グループは親グループがアクセスできるすべてのアクセス レベルにアクセスできます。したがって、親グループがすでにアクセスできるレベルに子グループ アクセスを割り当てる必要はありません。
How to access
- Select Users → Access Levels from the Administrator menu. Then...
- Select a link from the Level Name column to edit an existing level. Or...
- Select the New button to create a new access level.
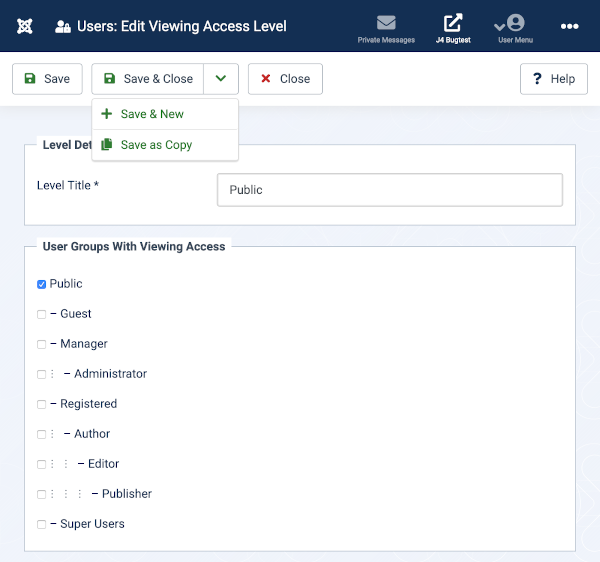
Level Details
- Level Title: Enter a Title for this Access level.
- User Groups With Viewing Access Check any Group to have this Access Level.
User Groups With Viewing Access
Select a check box to add a user group to a viewing level. In the example shown all Groups are children of Public so it not necessary to check any of the child groups. They inherit the Public access permissions. This feature should only be used for custom groups!
Toolbar
At the top of the page you will see the toolbar shown in the Screenshot above. The functions are:
- Save. Saves the item and stays in the current screen.
- Save & Close. Saves the item and closes the current screen.
- Save & New. Saves the item and keeps the editing screen open and ready to create another item.
- Cancel. Closes the current screen and returns to the previous screen without saving any modifications you may have made.
- Help. Opens this help screen.
Quick tips
- If you add a new group, you may need to edit any access levels that this group should have access to.
