Configurar un sitio multilingüe - Activar los plugins de idioma
From Joomla! Documentation
Cómo configurar un sitio Joomla! multilingüe
Artículos de esta serie
- Introducción
- Paso 1: Instalar un nuevo idioma
- Paso 2: Crear un idioma de contenido
- Paso 3: Activar los plugins de idioma
- Paso 4: Añadir contenido multilingüe
- Paso 5: Crear menús para el contenido multilingüe
- Paso 6: Duplicar tu plantilla para cada idioma
- Paso 7: Añadir un selector de idiomas
- Paso 8: Explorar el sitio multilingüe
Joomla! te permite crear fácilmente un sitio web multilingüe, sin necesidad de instalar ninguna extensión de terceros. En este tutorial, encontrarás una una completa guía de los pasos necesarios para crear un sitio Joomla! con soporte para múltiples idiomas.
Step 3a - Enabling the Language Filter plugin
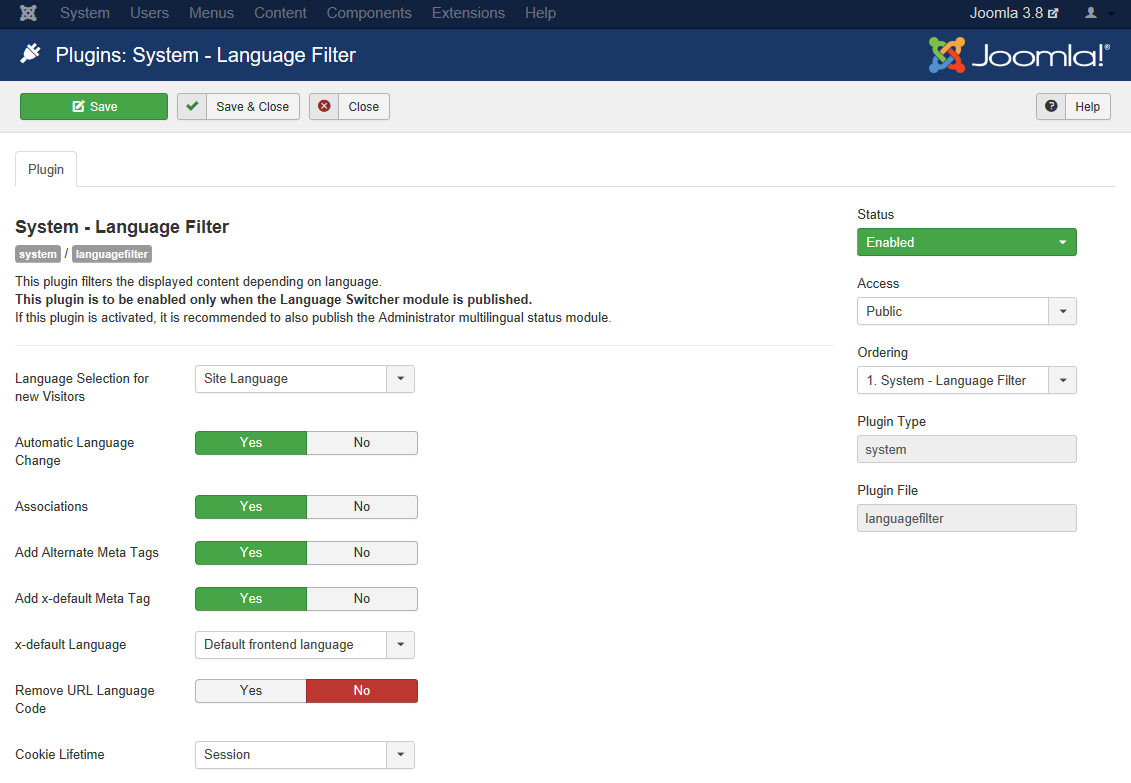
Joomla! comes with a language filter plugin, which enables the CMS to recognize the different installed languages and display only the content relevant to the current language.
Edit this plugin to change its settings:
- Go to Extensions → Plugins.
- Search and edit the plugin System - Language Filter.
- Switch its Status to Enabled.
- Item associations: Set to Yes. This option will allow item associations when switching from one language to another.
- Remove URL Language Code: Remove the defined URL Language Code of the Content Language that corresponds to the default site language when Search Engine Friendly URLs is set to Yes.
- Click Save & Close.
The language files are now set up properly and you’ve switched on Joomla’s built-in Language Filter. By default, this plugin will try to detect the language settings of the visitor browser and display the site in this language (if available).
Step 3b - Enabling the Language Code plugin
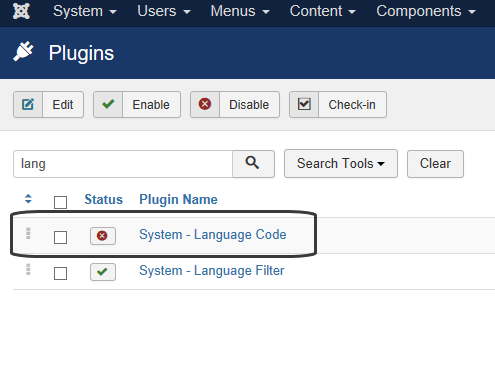
Joomla! comes with a built-in language code plugin, which provides the ability to change the language code in the generated HTML document to improve SEO. The fields will appear when the plugin is enabled and saved.
- Go to Extensions → Plugins.
- Search the plugin System - Language Code.
- Switch its Status to Enabled.

