Adding a new article: Difference between revisions
From Joomla! Documentation
No edit summary |
No edit summary |
||
| Line 19: | Line 19: | ||
#* If you have not completed the Article Title, Section or Category fields, you will see an error message indicating this. | #* If you have not completed the Article Title, Section or Category fields, you will see an error message indicating this. | ||
[[Category:Tutorials]][[Category:Article Management]] | [[Category:Needs_to_be_marked_for_translation]][[Category:Tutorials]][[Category:Article Management]] | ||
[[Category:Beginners]] | [[Category:Beginners]] | ||
Revision as of 12:19, 14 June 2016

This Article Needs Your Help
This article is tagged because it NEEDS UPDATING. You can help the Joomla! Documentation Wiki by contributing to it.
More pages that need help similar to this one are here. NOTE-If you feel the need is satistified, please remove this notice.
Reason: 'Needs an update using version 3.x'
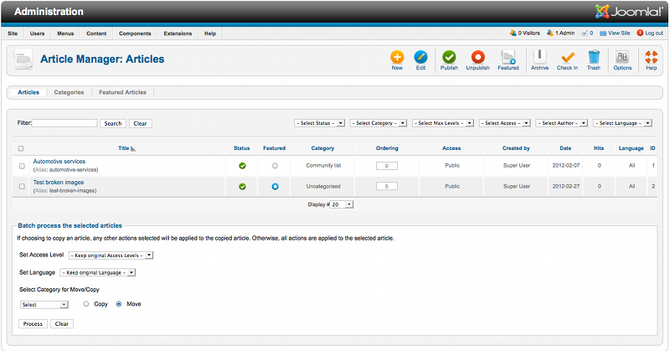
New articles can be added using either the Add Article button or the Article Manager Screen in the Administrator back-end.
- Log in to the Administrator back-end. To learn how to do this read: Logging in or out of the Administrator back-end.
- Either:
- Click on the Add New Article button in the main Control Panel to open the New Article screen or,
- Click the Content → Article Manager → New Article menu item to go to the Article Manager. Then click the New toolbar button.
- The New Article screen contains options for categorising and naming the article, editing content and selecting parameters.
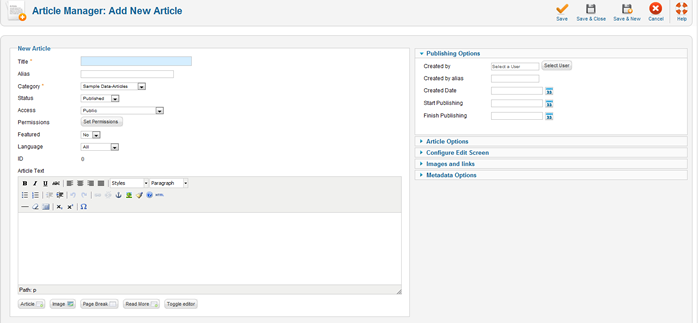
- Enter a title in the Title field. This is used when the article title is displayed.
- Enter an alias in the Alias field. The alias is used to refer to the title and is important for the Search Engine Friendly Address features in Joomla!. If you do not enter anything, Joomla! will generate it for you.
- Select a Category using the drop down menus.
- Choose whether the article is published or not using the Published drop down menu.
- Choose whether the article will be displayed on the home page using the Featured drop down menu.
- Now enter your content using the editor in the New Article screen. For more information on the different editors available in Joomla! read: Content Editors.
- You may also choose Parameters for the article. Click on each section to view the parameters and change the settings to suit your requirements.
- Click the Save toolbar button to save your article.
- The Save & Close toolbar button will save your changes and return you to the Article Manager screen.
- The Save button will save your changes but leave you in the Article Edit screen.
- You should see a blue message: Successfully saved changes to Article: article_title.
- If you have not completed the Article Title, Section or Category fields, you will see an error message indicating this.

