Познакомтесь с шаблонами
From Joomla! Documentation
== Вступление ==
Этот ознакомительный урок предоставит Вам понятие о шаблонной системе Joomla! и [о том], как Вы сможете ее использовать.
==Назначение шаблонов==
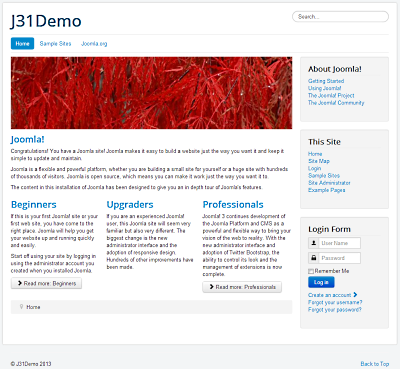
A template controls the overall look and layout of a site. It provides the framework that brings together common elements, modules and components as well as providing the cascading style sheets for the site. Both the Frontend and the Backend of the site have templates.
When Joomla! is first installed, several templates are automatically included. You can find many more templates at other websites. Some are available without charge under various licenses, and some are for sale. In addition, there are many developers available who can make custom templates. You can also make your own template.
Templates are managed with the Template Manager, which is located on the Extensions menu in the Backend (Administrator) area of your site.
Why Does Joomla! Use Templates? [A Real Beginner's Guide!]
The way Joomla! is designed separates out the key tasks involved in producing a website for efficient maintenance of the software. One of these tasks is to create the aesthetic (the look, feel and layout) of the site. This includes making decisions such as which content elements (components, modules and plugins) you may want to place in any given page.
When producing a web page, the location of most elements will stay the same (menus, banner locations, sidebars etc.). Additionally, you will want to create the same look (fonts, header styles, colour scheme etc.) for every page. For some parts of the site you may want to alter the general feel to indicate a different purpose for those pages (such as a blog section). A little planning is required for this, but once you have settled on the overall layout for your site, you then have the task of producing each page of content.
And that’s where the template comes in. You can either write all the code for each page separately, or use a template for each major section of your site so that when you want to create a new page you simply “fill in the blanks”. Okay, perhaps it's not that simple, but this tutorial is designed to give you a step by step guide for effective template use, starting with how to use one and ending with how to create one for yourself.
- Use one of the templates supplied with Joomla!
- Download one of the many free offerings from the Internet.
- Pay for one to be modified or produced from scratch if your needs cannot be met any other way.
Summary – a template controls the look of your site and at the same time allows the website Administrator to focus more on the actual content.
= Что Вы можете сделать =
A template is used to manipulate the way content is delivered to a web browser or screen reader. Here are some ways you can employ this on your Joomla!-powered site.
Layout
The template is the place where the design of the main layout is set for your site. This includes where you place different elements (modules). For example: You can control the placement of menus, a log in form, advertising banners, polls, etc.
The main body(article) of the page can be altered in style(you can select from different styles of display such as typical blog layout, a news article, etc) depending on the templates layout. *See the example image. Note the differences in layout, but how the look is consistent. The sidebar of modules has been moved from left to right and its order rearranged.
If the template is designed to provide choices, you can also "dynamically" alter the content placement on your site, perhaps putting the main menu on the right or left side of the screen.
Color Scheme
Using CSS within the template design, you can change the colors of your backgrounds, text, links or just about anything that you could within your ordinary HTML code. Some templates provide a method to change the color in template management, others require you to modify the template's .css file(s).
Images and Effects
You can also control the way images are displayed on the page, and even create flash-like effects or include AJAX applications such as drop-down menus.
Fonts
The same applies to fonts. The designs for these are all set within the template's CSS file(s) to create a uniform look across your entire site, which makes it fantastically easy to change the whole look just by altering one or two files rather than every single page.
Browser Specific Solutions
A template can be designed to alter how it displays on different web browsers, allowing you to take full advantage of the latest developments without making your site inaccessible to those who are not able to run "up-to-the-minute" system upgrades (such as certain companies who limit what software their employees can use).
= Поставляемые шаблоны =
С установкой Joomla! 3.х по умолчанию поставляются следующие шаблоны
Шаблоны лицевых страниц
- Protostar (шаблон по умолчанию)
- Beez 3
Шаблоны административной панели
- ISIS (шаблоны по умолчанию)
- Hathor
= Переключение шаблонов =
To change the default Template for the Site (frontend) or Administrator (backend), follow these steps:
Access the template manager
- Log in to the Administrator (backend). If you are not sure how to do this see: To log in to the Administrator (backend)
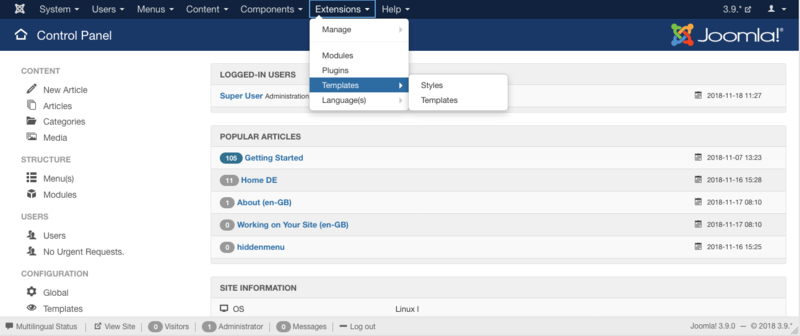
- Click on: Extensions → Templates
You will now see the Template Manager screen.
Note: If you do not see Templates listed as an option on the Extensions menu, then it is most likely because you are not logged in as a Super Administrator. Only Super Administrators will see this menu item.
Managing default template
From here you manage your templates for frontend and backend. The default view shows your installed frontend templates styles. The default style for the frontend is marked with a star; in the image below it is 'protostar - Default'.
To change the default style to 'beez3':
- click the checkbox left from the style name to select it;
- click "Default" on the toolbar;
the star changes from 'protostar' to 'beez3' and you are done. Alternatively, you can click on the shadow of a template's default star to quickly set the template as default.
You can use the filter drop-downs on the top or the filter search to limit the number of templates shown in the list of templates. Other options are:
- edit - edit the options and Menu Assignment a template is shown on (see below)
- duplicate - duplicate the style of the template
- delete - delete a template style (must not be default template style)
Assigning more than one template style for the frontend
Joomla gives you the option of switching between two or more styles on the frontend. This is done with "Menu Assignment", so you can set different styles for each menu or only a menu item. This allows specific "pages" that are defined by menu links to set for a "specific" style. Styles can be of different templates.
Template manager method
Click on: Extensions → Template Manager
- You will see your installed template styles, now choose a style which is not set as your default one. Yellow star indicates the style is a default.
- Click on the style name or hit the checkbox to the left of the style name, and click "Edit" on the toolbar.
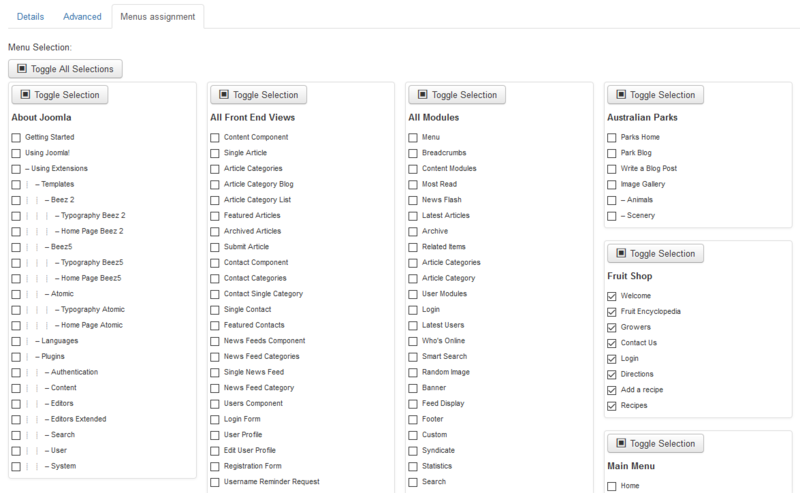
- You now see the page "Template: [Edit style]", and go to the section "Menu Assignment" block and choose the menu items on which the style should be shown.
- Click "Save" on the toolbar and you´re done. The menu item will now show the selected template.
- Go to the frontend of your website and refresh the page to view the modifications.
Menu manager method
- Access menu item Menus → [Menu Name]
- Choose a menu item by checking the box to the left of its name and then click on the Edit toolbar button. Alternatively, simply click the name of the menu item to edit it.
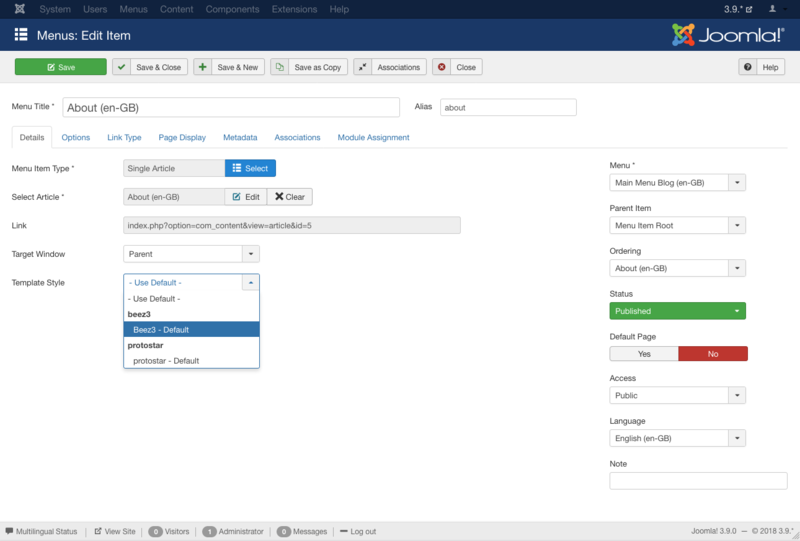
- On the Edit Menu Item screen, in Template Style, choose the desired template style and click on the Save button.
- Go to the frontend of your website and refresh the page to view the modifications.
See also
= Установка шаблонов =
Установка через административную панель (упакованный файл шаблона)
Войдите в административную панель своего веб-сайта ("www.<ваш_вебсайт>.com/administrator")
Щелкните на Расширения -> Менеджер расширений
Вы увидите веб-страницу "Менеджер расширений"
Здесь Вы сможете установить свои шаблоны, плагины, модули, компоненты и языки. У Вас имеются следующие три опции:
Установить из JED - (выберите расширение, перечисленное на JED)
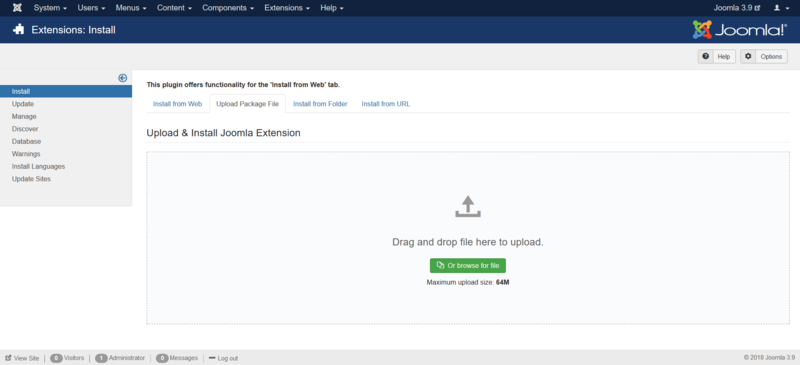
Загрузить файл пакета - (выберите на своем жестком диске какой-либо, загрузите и установите его)
Установить из катлога - (введите путь к данному пакету на Вашем веб-сервере)
Установить из URL - (введите URL ссылку на свой пакет)
Четвертая опция исполняет для Вас все. Ваша среда должна быть правильно настроена для того, чтобы разрешить этот [функционал]. Вторая опция требует, чтобы Вы скачали данное расширение на свой компьютер. Третья опция требует, чтобы Вы распаковали папки/файлы и переместили их на свой веб-сервер. Все опции требуют, чтобы Ваш сервер обладал правом на запись на веб-пространстве.
Здесь мы выбираем второй метод: "Загрузить файл пакета"
Выберите [нужный] пакет на своем компьютере и щелкните по кнопке "Загрузить и установить"
Если этот пакет не содержит [никаких] ошибок, то Вы закончили [установку его расширения] и получите сообщение об успехе, как указанное ниже.
Проверка установки
Перейдите со вкладки "Установка" на вкладку "Управление" и настройте фильтр под названием "Тип" на "Шаблон". [В ответ] установленный [Вами] шаблон должен появиться в списке. Если этот так, то данный шаблон был установлен правильно. Теперь Вы можете назначить один из стилей какому-либо пункту меню или назначить этот стиль как [стиль] по умолчанию.
Что касается административных шаблонов, удостоверьтесь в том, что у Вас [открыты] два окошка менеджера шаблонов. В одном из них активируйте данный новый шаблон и, если что-то пошло не так, перенастройте его в другом.
Установка через FTP (распакованный файл шаблона)
Шаблоны можно также устанавливать через FTP, без их [установочного файла] пакета. Просто выберите папку конкретного шаблона на своем компьютере и загрузите ее на свой веб-сервер с помощью клиента FTP. Удостоверьтесь в том, что Вы загрузили эту папку в следующую директорию: /<путь_к_вашей_установке_Joomla>/templates/ - где /<путь_к_вашей_установке_Joomla>/ - это [папка в которой] Joomla установлена на Вашем веб-сервере. Этот метод в основном используется когда какой-либо шаблон создан Вами лично и Вы не желаете создавать для него [установочный] пакет или когда Вы желаете загрузить одновременно более чем один шаблон. Затем Вы должны пройти в менеджер расширений и щелкнуть в под-меню на "Поиск". Если Ваш шаблон не появится тут же, щелкните на "Поиск". [В ответ] должен появиться список не установленных объектов. Щелкните на чекбокс слева от Вашего шаблона и щелкните на [кнопку] "Установить".
Примечание: Если Вы начинающий, то не пытайтесь устанавливать через FTP компоненты, модули и плагины. Им необходимы записи в базе данных, которые, если Вы обошли установку [с помощью] файла пакета, Вам придется вводить вручную.

